Sunday, December 23, 2012

Tahitian Coffee

I'm not sure if this recipe is actually something folks drink in Tahiti. But just as Bailey's Irish cream makes regular coffee into Irish hot coffee or Kahlua makes it into Mexican hot coffee, the addition of dark rum certainly makes this drink feel suited to a Tahitian isle.  Serve in place of spiked eggnog, mulled cider, or hot cocoa as you gather with friends and family in the next few days.

Ingredients:
  • 2 and 3/4 cups hot strong brewed coffee
  • 1/4 cup dark rum
  • 1 tablespoon vegan sugar
  • 1/2 cup low-fat vanilla non-dairy ice cream
  • 4 cinnamon sticks (optional for garnish)
1. In a pitcher or bowl, combine the coffee, rum, and sugar, stirring until the sugar dissolves.


2. Pour 3/4 cup coffee mixture into each of 4 mugs, and top each serving with 2 tablespoons ice cream (I used the soy vanilla from So Delicious).

Cinnamon sticks make a lovely garnish, plus impart a touch of cinnamon flavor to every sip.


Nutrition Info:
4 servings (3/4 cup coffee, 2 tablespoons ice cream), Calories 75

Tasting Notes:
Turns out the key here is the cinnamon stick garnish; the bitter black coffee and strong dark rum would have been too much for me otherwise, but slip the cinnamon stick in and let it infuse the drink with sweet-spicy goodness and you have a fantastic holiday drink. The ice cream melts quickly to become the "cream" in this coffee. Although the initial contrast between hot coffee and frozen ice cream is yummy, the overall effect is that you soon have a tepid beverage. Instead, I recommend Soyatoo's whipped cream, so the coffee doesn't cool down so much. If you do stick with ice cream, I recommend using a full 1/4 cup per serving; the drink is quite strong and black with only 2 tablespoons. But this recipe is still a fun alternative holiday beverage.

Rating:
3

Vegan extra:
Finding great beauty tools can be a little frustrating as a vegan. Luckily, I recently discovered EcoTools, eco-conscious and 100% cruelty-free makeup brushes with no animal bristles.


You can purchase individual brushes, or a cute little set with every tool you need to apply your holiday party face. Bonus points for the adorable carrying pouch made from cotton and hemp.

Tuesday, December 18, 2012

Southwest Chocolate Stack-Ups

If you're a bit tired of holiday cookies, this decadent dessert is a delicious alternative, and a fun afternoon project for kids. Make the components ahead of time, but assemble the stacks right before serving. You'll have a quadruple chocolate dose - two kinds of chocolate chips, cocoa powder, and chocolate syrup on top.  Look for Ah-laska or Santa Cruz chocolate syrup in a squeeze bottle; both are vegan.

Ingredients:
  • 1/2 cup semisweet chocolate chips (such as Chocolate Dream)
  • 1/2 cup Tofutti cream cheese
  • 1/2 cup vegan sugar, divided
  • 1/2 teaspoon vanilla extract
  • 1 (10-ounce) container Soyatoo whippable topping*
  • 1 tablespoon unsweetened cocoa
  • 1/4 teaspoon ground cinnamon
  • 6 (6-inch) flour tortillas
  • Cooking spray
  • 2 cups sliced strawberries
  • 1/4 cup chocolate minichips (such as Enjoy Life)
  • 8 tablespoons chocolate sundae syrup
1. Place 1/2 cup chocolate chips in a small glass bowl and microwave for 2 minutes, stirring halfway through. The chips should be almost melted, although you'll have the occasional chocolate chunk leftover.  Set aside.


2. Place the cream cheese, 1/4 cup sugar, and vanilla extract in a bowl and beat with a hand mixer until blended.

3. Pour the whippable topping into a second bowl and beat for 3 to 4 minutes, until thick.  Add the whipped topping and melted chocolate chips to the cream cheese mixture, stirring gently to blend.  Cover and chill.


4. Meanwhile, combine the remaining 1/4 cup sugar in a bowl with the cocoa and cinnamon.  Cut each tortilla into 4 wedges, and arrange in a single layer on baking sheets coated with cooking spray.  Coat 1 side of the tortilla wedges with cooking spray, and sprinkle evenly with the cocoa mixture.  Bake at 350 degrees for 10 minutes.  Remove from the pan and cool completely on a wire rack.


5. To assemble the stacks, spread 1 and 1/2 tablespoons cream cheese mixture on 1 tortilla wedge, cocoa side up.


6. Top with an additional tortilla wedge, cocoa side up, followed by 1/4 cup strawberries, 1 and 1/2 tablespoons cream cheese mixture, a final tortilla wedge, cocoa side up, and a final 1 and 1/2 tablespoons cream cheese mixture.  Sprinkle with 1 and 1/2 teaspoons minichips, and drizzle with 1 tablespoon chocolate syrup.


7. Repeat the procedure 7 times with the remaining ingredients.

Nutrition Info:
8 servings (1 stack), Calories 341

Tasting Notes:
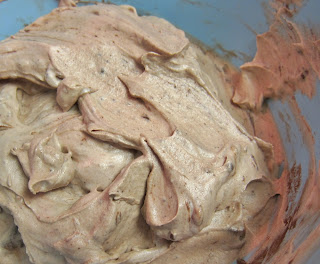
First things first: the cream cheese mixture. It tastes a bit like chocolate mousse...only the lightest, fluffiest, airiest mousse you've ever eaten.  Kind of, well, like eating creamy chocolate air. I believe the "Halleluiah Chorus" may actually have struck up in my head after the first couple bites.  Wow.  The tortilla crisps tasted a bit like cinnamon toast crunch cereal, which is not at all a bad thing.  Meanwhile the chocolate - whether the chocolate chips on top or the chocolate syrup - were just gooey yummy bits of chocolate. Put it all together and you have one heck of a dessert.

The mere 1/4 cup of strawberries sort of got lost in the mix. Double the amount of strawberries if you want a fruitier dessert. That said, you could almost do away with them otherwise. I was not entirely wild about how crispy and crunchy the tortillas were; they didn't fit in with the rest of the dish, so I'd use something softer like thin cake layers next time, although then, you couldn't describe this dish as "Southwest."  A "5," therefore, for the separate components of the dessert, but a "4" once you put it all together.

Update: Despite the recommendation to serve immediately, I actually liked these better the next day. The tortilla wedges soften under the cream cheese mixture by that point, so the whole dessert goes together better. Ignore my earlier admonition to assemble just before serving. Either way, be prepared for a gooey mess of awesomeness, and enjoy. 


Rating:
4

Sunday, December 16, 2012

Glazed Carrots with Candied Chestnuts

Baby carrots and bottled chestnuts turn into little candied jewels in this sweet side dish. It's perfect for a holiday feast.

Ingredients:
  • 5 tablespoons vegan brown sugar, divided
  • 4 teaspoons vegan butter, divided
  • 1 cup coarsely chopped bottled chestnuts
  • 2 teaspoons canola oil
  • 4 cups baby carrots 
  • 1/4 cup vegan chicken broth (such as Imagine)
  • 1 tablespoon chopped fresh parsley
  • 1/4 teaspoon salt
1. In a medium skillet, combine 2 tablespoons of the brown sugar and 2 teaspoons butter over medium-high heat.  Bring to a boil.

Note: If this step sounds odd, since you're not adding any liquid, don't worry. The brown sugar and butter will go from this:


to this:


quite quickly, at which point they'll came to a boil.

2. Add the chestnuts and cook for 2 minutes, stirring often, until browned.  Spread the chestnuts in a single layer on wax paper and let stand until dry.


3. Heat the remaining 2 teaspoons butter with the canola oil in a large skillet over medium-high heat.  Add the carrots and saute for 5 minutes.  Reduce heat to medium-low.


4. Stir in the remaining 3 tablespoons brown sugar and cook for 10 minutes, stirring frequently.  Add the chicken broth and simmer for a final 2 minutes.  Stir in the parsley and salt, and top with the chestnuts.

Nutrition Info:
8 servings (1/2 cup), Calories 107

Tasting Notes:
Delicious - sweet without being overly sugary, and with great contrast between the meaty chestnuts and the crisp carrots. I did wish the carrots were more tender, so would either saute longer on the front end, or cut into smaller slices that would cook faster, even though that would require more prep work. A nice occasional fresh burst of parsley helped offset the fact that yes, this was making your vegetables into candy.

Rating:
3.5

Vegan extra:
If you need a little help relaxing and curbing stress during the holidays, I recommend the most natural cures possible, the things you already know you should do like getting enough sleep, thinking positive, and remembering to exercise. Even though studies show vegans put on less holiday-weight gain than meat eaters, we're not immune if we reach for the vegan cookies every time the holiday pressure gets to us. One of my favorite ways to de-stress is to perform a series of relaxing stretches. And even better if you can do those stretches in bed right before sleep!

Wednesday, December 5, 2012

Marinated Lentil Salad

If you know you need to eat your lentils, but don't like them overcooked and mushy, then this salad is for you. The lentils get only a quick simmer (15 minutes) so they retain their shape and texture. And really, we all need to eat our lentils; I've always known they were high in protein and fiber, but glancing at the package tonight, I realized one 1/4 cup of dried lentils has a walloping 15 grams of fiber - that's 60% of your daily requirement. Eat up.

Ingredients:
For the vinaigrette:
  • 1/4 cup fresh-squeezed lemon juice
  • 1/4 cup red wine vinegar
  • 3 tablespoons olive oil
  • 1/2 teaspoon salt
  • 1/4 teaspoon vegan sugar
  • 1/4 teaspoon black pepper
For the salad:
  • 1/2 cup chopped parsnip
  • 1/2 cup chopped carrot
  • 6 cups boiling water
  • 1 and 1/2 cups dried lentils
  • 1/2 cup thinly sliced celery
  • 1/3 cup thinly sliced green onions
  • 3 tablespoons minced fresh parsley
1. To prepare the vinaigrette, whisk together the lemon juice, vinegar, olive oil, salt, sugar, and black pepper.  Set aside.


2. To prepare the salad, add the parsnip and carrot to the boiling water and cook for 1 minute, until tender.  Remove the vegetables with a slotted spoon.


3. Add the lentils and return to a boil.  Reduce heat and simmer for 15 minutes, until tender. Drain over a colander, and let the lentils cool.


4. Combine the lentils in a bowl with the parsnip, carrot, celery, green onions, and parsley.  Stir in the vinaigrette and let marinate at room temperature for at least 20 minutes. I gave the salad a touch longer - about 40 minutes before serving.

I served with homemade biscuits, and added Brussels sprouts as an extra veggie to round out the meal. 


Nutrition Info:
8 servings (2/3 cup), Calories 186

Tasting Notes:
Though I worried the vinegar and lemon juice would be too strong, the vinaigrette had a nice balance, with tart and astringent flavors tempered by the olive oil. The salad itself  was nice, but I found myself wanting a creamy element. The soft, cooked parsnip came closest, so I would blanch the celery too instead of leaving it raw. This salad would be better stuffed in a pita pocket or rolled up in flatbread; it was a touch plain on its own.

Rating:
3

Tuesday, December 4, 2012

Mini Peppermint and Chocolate Chip Cheesecakes

These bite-sized desserts are adorable, and perfect for your next holiday party, since no utensils or plates are required. Full disclosure: I bought a mini muffin pan 2 years ago because I thought it was so darn cute, but this is the first time I'm using it.

Ingredients:
For the crust:
  • 1 cup chocolate cookie crumbs*
  • 2 tablespoons vegan sugar
  • 2 tablespoons melted vegan butter
  • Cooking spray
For the filling:
  • 12 hard peppermint candies (such as Yummy Earth), divided**
  • 2/3 cup plus 1/2 cup Tofutti cream cheese
  • 1/4 cup vegan sugar
  • 2 tablespoons flour
  • 3 Ener-G eggs
  • 1 cup vegan sour cream
  • 1/4 cup chocolate minichips (such as Enjoy Life)
  • 1/4 teaspoon peppermint extract
  • 1 cup whipped Soyatoo whippable topping***
  • 2 tablespoons chocolate sprinkles (such as Edward & Sons)
1. To prepare the crust, combine the cookie crumbs, 2 tablespoons sugar, and butter in a bowl.  Press about 1 and 1/2 teaspoons of the mixture into the bottom of each of 48 mini muffin cups coated with cooking spray.  Bake at 325 degrees for 5 minutes.


2. Meanwhile, prepare the filling: combine 6 peppermint candies, the cream cheese, 1/4 cup sugar, the flour, eggs, and sour cream in a food processor and process until smooth.  Stir in the chocolate minichips and peppermint extract.  Divide the filling evenly over the prepared crusts.


Note: It's helpful to use an ice cream scoop, both to measure out the batter evenly and to get it into the muffin cups cleanly. It will work out to about one-third of a standard-size ice cream scoop per cheesecake.

3. Bake at 325 degrees for 12 minutes; the cheesecakes should be just set.  Cool in the pans on a wire rack for 30 minutes.  Remove from the pans and cool completely. Although I worried that the cheesecake batter would stick to the pans, these actually came out quite cleanly.

4. Top each mini cheesecake with 1 teaspoon whipped topping.


5. Crush the remaining 6 peppermint candies (a meat mallet works well) and sprinkle evenly over the tops of the cheesecakes, along with the chocolate sprinkles.


*Any vegan chocolate cookies will do, but I find that the best cookies to turn into crumbs are the chocolate alphabet cookies from Newman's Own Organics.  Use about 55 cookies to make 1 cup crumbs.

**Yes, vegan hard peppermint candies exist, from the great company Yummy Earth (which also makes fantastic lollipops). You'll get wonderfully strong, fresh peppermint flavor, although not the red and white color of traditional peppermint candies (see below). If you want a touch of color on top, consider crushing a vegan candy cane.


***Make sure to buy Soyatoo's whippable topping in a box, not their rice whip or soy whip in a can. Beat with a hand mixer for 3 to 4 minutes, and you'll have a thick, rich whipped cream that will hold its shape long after you top these li'l cheesecakes. 

Nutrition Info:
48 servings (1 cheesecake), Calories 54 

Tasting Notes:
Eat these in one bite for the full effect - just the right touch of peppermint, tasty chocolate, and a tangy cheesecake filling.  The disappointing element here was the crust, which tasted dry and stayed quite crumbly even after baking. Use an extra tablespoon of butter and it should set better.  The chocolate mini chips were a nice crunch in the creamy cheesecake.  As a bonus, these tasted even better chilled, so feel free to make ahead.

Rating:  
4