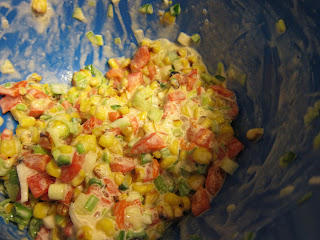
Sunday, November 28, 2010

Roasted Squash Stuffed with Corn Bread Dressing

There are two components to this wonderful vegan entree - first making the corn bread, then assembling the stuffed squash.  It's worth the time and effort however; the corn bread can be made and toasted ahead of time, and you can roast and refrigerate the squash up to 2 days in advance, so you're not actually doing too much when it comes time to prepare dinner.  Make sure to buy acorn squash that are about 1 pound each; some of the ones I see in the supermarket these days are nearly twice that size!

A quick note on the term "dressing," since it refers in this recipe not to a liquid dressing as for a salad, but rather as a term interchangeable with "stuffing."  There is really no difference between a stuffing and a dressing, and I assume it is only used in this recipe title to avoid using the word "stuffing" redundantly.

Ingredients:
For the Maple Corn Bread:
  • 1 teaspoon canola oil
  • 1 and 1/2 cups all-purpose flour
  • 3/4 cup masa harina
  • 3/4 cup yellow cornmeal
  • 1 tablespoon baking powder
  • 1 teaspoon fine sea salt
  • 1 and 1/2 cups water
  • 1/3 cup maple syrup
  • 5 tablespoons melted vegan butter
  • 1 finely chopped jalapeno pepper
1. Coat a 9-inch cast-iron skillet with the canola oil and place in an oven preheated to 350 degrees for 10 minutes.

2. While the skillet preheats, lightly spoon the flour and masa harina into dry measuring cups, and level with a knife.  Combine the flour, masa harina, cornmeal, baking powder, and salt in a large bowl.

3. Combine the water, maple syrup, melted butter, and jalapeno, stirring with a whisk.  Add to the flour mixture and stir until moist.  Spoon the batter into the preheated pan - work quickly because the batter will start to set almost instantly against the hot cast-iron.

4. Bake at 350 degrees for 25 minutes - a wooden pick inserted in the center should come out clean.  Remove the corn bread from the skillet and cool completely on a wire rack.


Note: you won't have to use all of the corn bread for the stuffing that follows, so enjoy leftover slices alongside a bowl of soup or chili.  If you prefer, you could also just make the corn bread and stop reading this post right now.

Nutrition Info:
12 servings (1 wedge), Calories 184

If you're interested in the stuffed squash, read on...

Ingredients:
  • 7 and 1/2 cups (1/2-inch) cubed Maple Corn Bread
  • Cooking spray
  • 5 acorn squash (about 1 pound each)
  • 4 cups boiling water, divided
  • 1 cup dried cranberries
  • 1/4 cup dried currants
  • 2 teaspoons olive oil
  • 1 cup finely chopped onion
  • 1 cup finely chopped celery
  • 1 cup finely chopped carrot
  • 2 tablespoons chopped fresh sage
  • 3 minced garlic cloves
  • 1 cup vegetable broth
  • 1/4 cup toasted and chopped pecans*
  • 2 tablespoons finely chopped fresh parsley
  • 3/4 teaspoon fine sea salt
  • 1/4 teaspoon black pepper
1. Arrange the corn bread cubes in a single layer on a jelly roll pan or baking sheet coated with cooking spray.  Bake at 400 degrees for 30 minutes, stirring twice (at about the 10 and 20 minute marks); set aside.


2. Cut the squash in half lengthwise and discard the seeds and membranes.  Arrange the squash, cut sides down, in a 13x9-inch baking dish.  Coat with cooking spray, and pour 2 cups boiling water over the squash.  Cover and bake at 350 degrees for 20 minutes.  Remove the squash from the pan with a slotted spoon once out of the oven, and place on a baking sheet - but leave the hot water in the pan!

3. While the squash bakes, combine the dried cranberries, currants, and remaining 2 cups boiling water in a bowl; cover and let stand for 30 minutes, then drain and set aside.

4. Heat the olive oil in a large skillet over medium-high heat.  Add the onion; saute for 5 minutes.  Add the celery, carrot, sage, and garlic; saute for 3 minutes.


5. Now it's time to put it all together: Combine the toasted corn bread cubes, the cranberry/currant mixture, the onion mixture, vegetable broth, pecans, parsley, salt, and black pepper, and toss to coat.  Spoon about 1 cup of the dressing into each squash half, pressing down so it is firmly in place.  Place the squash, stuffed sides up, in the baking dish.

6. Bake at 350 degrees for 30 minutes. 

Note: I actually baked in two batches (5 stuffed squash halves each time) to avoid overcrowding the dish.  I have a hard time imagining how the author of this original recipe fit all 10 squash halves in at one time.

*Don't forget to toast the pecans first - about 4 to 5 minuets in a dry skillet over medium heat will do the trick. Shake or stir the pan frequently to avoid burning the nuts.

Nutrition Info:
10 servings (1 stuffed squash half), Calories 398

Tasting Notes:
A wonderful blend of savory, spicy (the jalapeno) and sweet (the dried fruit).  The stuffing itself was so good that the acorn squash underneath almost felt unnecessary (although was yummy, too).  I would, however, have liked the squash to be a bit more tender, so might recommend an extra 10 or 15 minutes of baking time when the squash are initially in the oven sans stuffing.  As for the Maple Corn Bread - equally delicious.  A nice bite from the jalapeno, but also the subtle sweetness of the maple syrup. 

Rating:
4

Saturday, November 27, 2010

Maple-Glazed Rutabaga

Leftover root veggies from the holiday?  Try this simple side dish. Although I made it with rutabaga tonight, you could try it with turnips, parsnips, or carrots as well.  The sweetness of the maple syrup is a lovely contrast to the natural bitterness of rutabaga.

Ingredients:
  • 1/4 cup maple syrup
  • 1 and 1/2 teaspoons melted vegan butter
  • 7 cups (1/2-inch) peeled and cubed rutabaga
  • 1/4 teaspoon salt
  • 1/4 teaspoon black pepper
  • Cooking spray
1. Combine the maple syrup and butter in a large bowl, stirring with a whisk.  Add the rutabaga, salt, and pepper, and toss to coat.  Spread the mixture on a jelly roll pan or baking sheet coated with cooking spray.


2. Bake at 425 degrees for 35 minutes, stirring occasionally.  I served these tonight with the vegan pork from Match meats, shaped into "pork chops" and cooked for about 3 minutes on each side in a skillet.  If you haven't already tried Match meats, check out their truly amazing products: www.matchmeats.com

Nutrition Info:
4 servings (1 cup), Calories 153

Tasting Notes:
Perfectly tender, with just the right touch of sweetness from the maple syrup.  This side dish would be equally at home on a busy, casual weeknight as it would be at a more elegant dinner for company.  No complaints on this one.

Rating:
3.5

Wednesday, November 24, 2010

Cranberry Quick Bread with Raisins and Hazelnuts

Ok, I promise this is the last time I'm going to extol the cranberry, at least for a little while, but let me give you one more fun tidbit about these little berries before I launch into the recipe itself.  How do you know if a cranberry is good?  Bounce it on your kitchen counter - fresh cranberries bounce!  And are adorable doing so.  Anyway, make this breakfast bread for your family to enjoy over the Thanksgiving holiday.  Or, serve it with some homemade vegan cottage cheese and fruit salad as I did tonight; it makes the perfect light supper or lunch before tomorrow's big feast.  Either way, I won't be posting tomorrow, so enjoy a wonderful cruelty-free Thanksgiving!

Ingredients:
  • 1 and 1/3 cups all-purpose flour
  • 2/3 cup whole wheat flour
  • 1 cup vegan sugar
  • 1 teaspoon baking powder
  • 1/2 teaspoon baking soda
  • 1/4 teaspoon salt
  • 3/4 cup apple juice
  • 3 tablespoons canola oil
  • 1 teaspoon grated orange rind
  • 1 Ener-G egg
  • 1 and 1/3 cups chopped fresh cranberries
  • 1/3 cup golden raisins
  • 1/4 cup chopped hazelnuts
  • Cooking spray
1. Lightly spoon both flours into dry measuring cups, and level with a knife.  Combine the flours in a large bowl with the sugar, baking powder, baking soda, and salt; make a well in the center of the mixture and set aside.

2. In a separate bowl, combine the apple juice, canola oil, orange rind, and Ener-G egg.  Add to the flour mixture and stir just until moist, then fold in the cranberries, raisins, and hazelnuts.  Don't worry if your batter gets stained a bit pink from the cranberries; it won't be noticeable once the batter darkens while baking.


3. Spoon the batter into a 9x5-inch loaf pan coated with cooking spray, and bake at 350 degrees for about 48 to 50 minutes, until a wooden pick inserted in the center comes out clean.  Cool for 10 minutes in the pan on a wire rack before removing from the pan and cooling completely on a wire rack.

Nutrition Info:
16 servings (1 slice), Calories 162 

Tasting Notes:
I absolutely loved the fresh cranberries in here, as opposed to dried cranberries.  If you can imagine cranberry juice cocktail turned into a bread, that's kind of what this bread tasted like - yum! The hazelnut was another, nicely unexpected flavor, since most breads like this I've baked in the past use walnuts. That said, if you have walnuts on hand - or just prefer them - feel free to swap out for the hazelnuts.

Rating:
3.5

Sunday, November 21, 2010

Parsnip and Portobello Casserole

This side dish casserole is made up of a delightfully surprising blend of ingredients - it's sure to get even picky eaters to eat their root vegetables!

Ingredients:
  • 6 ounces portobello mushroom caps
  • Cooking spray
  • 2/3 cup chopped vegan ham slices (such as Yves Veggie)
  • 1 cup chopped yellow onion
  • 2 tablespoons minced shallots
  • 2/3 cup vegetable broth
  • 2 and 1/2 cups shredded parsnip
  • 1/4 teaspoon black pepper
  • 1/2 cup shredded Gouda Sheese
  • 1/4 cup dry breadcrumbs
  • 2 tablespoons chopped fresh parsley.
1. Scrape the brown gills from the undersides of the portobello caps with a spoon and discard the gills.  Chop the mushroom caps to equal 3 and 1/2 cups, and set aside.

2. Heat a large skillet coated with cooking spray over medium-high heat.  Add the chopped ham and saute for 2 minutes, stirring frequently.  Add the onion and shallots; saute 5 minutes.  Add the chopped portobello and the vegetable broth; cook for 5 minutes, stirring frequently.  Finally, add the shredded parsnip and the black pepper; cook for 5 minutes, stirring frequently.


3. Remove from heat and stir in the shredded Gouda.

Note: Sheese is a UK company making vegan cheeses, but luckily you can now buy their products in the States through online retailers such as veganessentials.com

4. Spoon the mixture into a 2-quart baking dish coated with cooking spray.


5. In a small bowl, combine the breadcrumbs and parsley; sprinkle over the casserole.  Bake at 375 degrees for 10 minutes - the casserole should be golden brown by the end.  I served this with the lentil-sage slices from Field Roast, and some steamed baby carrots on the side.

Nutrition Info:
4 servings (3/4 cup), Calories 227 

Tasting Notes:
Interestingly, the various ingredients of this dish didn't quite seem to make a coherent whole. The shredded parsnip felt out of place with the cubes of mushroom and ham, for one thing. But I love the taste of Gouda Sheese, veggie ham, portobello mushrooms etc. all on their own.  So despite the fact that the ingredients added up to a rather disparate whole, that whole was, quite simply, delicious.  I'd make this again in a heartbeat.

Rating:
4

Friday, November 19, 2010

Curried Celeriac Slaw with Dried Cherries

The appearance of celeriac (celery root) never ceases to amuse me... Such an ugly vegetable, and yet such yumminess hiding just underneath that knobby surface.  When peeling the celeriac, square the bottom so it sits flat on a cutting board, then cut around the sides with a sharp knife to remove the peel - a vegetable peeler simply won't cut it for this veggie.  I also got the chance to play with the shredder blade on my new Cuisinart food processor for the first time tonight, and was delighted with the results.

Ingredients:
  • 1/2 cup dried tart cherries
  • 1/2 cup finely chopped red onion
  • 3 tablespoons plain non-dairy yogurt
  • 3 tablespoons vegan sour cream
  • 1 tablespoon Dijon mustard
  • 1 teaspoon curry powder
  • 1 teaspoon olive oil
  • 1/2 teaspoon vegan sugar
  • 1/2 teaspoon salt
  • 3 cups peeled and shredded celeriac
1. Combine all ingredients but the celeriac in a large bowl; set aside.

2. Add the shredded celeriac and toss well to coat, then cover and chill for 2 hours before serving.  Since the curry powder gave an Indian flavor to this slaw, I decided to serve it with the Indian matter tofu meal from Amy's, making for a no-fuss dinner.

Nutrition Info:
4 servings (about 2/3 cup), Calories 138 

Tasting Notes:
Just yum!  I'm not even usually one for slaws, but I loved the meatiness of the celeriac in comparison to the more-standard cabbage, and the curry and chewy cherries were simply a delight in every bite. 

Rating:
3.5

Wednesday, November 17, 2010

Barley-Mushroom Pilaf

Three kinds of mushroom add flavor to this easy, savory pilaf.  If you're feeling adventurous, try one of the vegan "chicken" broths on the market instead of vegetable broth.

Ingredients:
  • 3 cups vegetable broth
  • 1/3 cup chopped dried porcini mushrooms
  • 1 and 1/2 cups uncooked quick-cooking barley (such as Quaker)
  • 2 tablespoons olive oil
  • 3 cups quartered shiitake mushroom cups
  • 2 cups chopped onion
  • 3/4 teaspoon salt
  • 1/2 teaspoon dried rosemary
  • 1 (8-ounce) package presliced mushrooms
  • 1/4 cup Marsala
  • 2 teaspoons sherry vinegar
1. Combine the broth and dried porcini in a saucepan; bring to a boil, then stir in the barley.  Cover, reduce heat, and simmer for 12 minutes.

2. Heat the olive oil in a Dutch oven over medium-high heat.  Add the shiitake mushrooms, onion, salt, rosemary, and presliced mushrooms; saute for 5 minutes.  Stir in the Marsala and cook for 1 minute.

3. Add the barley mixture and the sherry vinegar, and cook for a final 2 minutes, stirring frequently.  Serve this hearty entree with some simple roasted asparagus on the side to round out the meal.

Nutrition Info:
4 servings (1 and 1/2 cups), Calories 415

Tasting Notes:
Wonderfully warming and filling.  I loved the hints of rosemary and sherry, although there was a bit too much onion in the dish for me, and I would probably decrease the amount to only 1 cup if I were to make this again.  Still, a great quick dish to have in one's repertoire for busy weeknights.

Rating:
3

Tuesday, November 16, 2010

Cranberry-Orange Tart

As I've mentioned previously on this blog, it's a shame that cranberries are a) so often confined only to cranberry sauce and b) confined only to Thanksgiving day.  Here's another cranberry recipe idea to break you out of that box!  Cranberries contain a high amount of tannins - antioxidants that may help prevent certain cancers and heart disease - so it's a shame not to enjoy these little berries more often.

Ingredients:
For the crust:
  • 1 and 1/2 cups all-purpose flour
  • 2 tablespoons vegan sugar
  • 1/8 teaspoon salt
  • 6 tablespoons vegan butter
  • 1/3 cup ice water
  • Cooking spray
For the filling:
  • 1/3 cup orange juice
  • 2 and 1/2 tablespoons cornstarch
  • 1 cup vegan sugar
  • 1/4 cup orange marmalade
  • 2 tablespoons toasted and chopped walnuts
  • 1 tablespoon grated orange rind
  • 1 (12-ounce) package fresh cranberries
1. To make the crust, lightly spoon the flour into dry measuring cups and level with a knife.  Combine the flour with 2 tablespoons sugar and the salt in a large bowl.  Cut the butter into small pieces, and cut into the flour mixture with a pastry blender until the mixture looks like coarse meal.

2. Sprinkle the ice water onto the flour mixture, 1 tablespoon at a time, tossing with a fork after each addition - don't stir or form a ball.  Gently press the dough into a 4-inch circle on a piece of plastic wrap.  Cover and chill in the fridge for 15 minutes.

3. Place 2 lengths of plastic wrap on a slightly damp work surface, overlapping them so that they extend at least 14-inches in all directions.  Unwrap the chilled dough and place on the plastic wrap; cover with 2 additional lengths of overlapping plastic wrap.  Roll the dough, through the plastic, into a 14-inch circle, then freeze for 5 minutes.


4. Remove the plastic wrap and fit the dough into a 10-inch round removable bottom tart pan coated with cooking spray.  Fold the edges of the dough under so no crust extends beyond the pan; set aside.

5. To make the filling, combine the orange juice and cornstarch in a large bowl, stirring with a whisk.  Add 1 cup sugar, the orange marmalade, the walnuts, the orange rind, and the cranberries.  Pour the mixture into the prepared crust.


6. Bake at 425 degrees for 20 minutes, then - without removing the tart from the oven - reduce the heat to 350 degrees and bake an additional 35 minutes.  Your crust should be lightly golden by the end.  Cool on a wire rack completely before serving.

Nutrition Info:
10 servings (1 wedge), Calories 274

Tasting Notes:
Absolutely no complaints, although neither was there anything that lifted this tart out of the ordinary for me.  A beautiful blend of the cranberry and orange flavors, and I was quite pleased with the way my crust came out, since that's always the trickiest part of a pie.

Rating:
3.5

Monday, November 15, 2010

Polenta Gratin with Mushrooms and Cheese

This easy main dish meal is comfort food for grown-ups.

Ingredients:
  • 1 (16-ounce) tube of polenta
  • Cooking spray
  • 1 (8-ounce) package presliced mushrooms
  • 1 teaspoon bottled minced garlic
  • 1/4 teaspoon salt
  • 1/3 cup vegan sun-dried tomato Alfredo sauce*
  • 1/4 cup chopped fresh basil
  • 1/4 cup shredded vegan cheese
1. Cut the polenta into 1/4-inch thick slices, and arrange the slices in an 11x7-inch baking dish coated with cooking spray - the slices should overlap slightly; set aside.

2. Heat a medium skillet coated with cooking spray over medium-high heat.  Add the mushrooms and cook for 2 minutes, stirring frequently.  Add the garlic and salt; cover, reduce heat, and cook for 2 minutes.  Stir in the Alfredo sauce and basil.

3. Pour the mushroom mixture evenly over the polenta, and top with the cheese.  I've been hearing rave reviews from my fellow vegans about Daiya shredded cheese, so tonight was my first time putting it to the test, using their shredded mozzarella to mimic the Fontina called for in the recipe I was following.  I am happy to report that it melts beautifully and tastes great.

4. Bake the gratin at 500 degrees for 7 minutes, then divide into 3 equal portions.  I served this with some homemade focaccia bread (made with my trusty bread machine) and a spinach salad tossed in an Italian vinaigrette.


*The sun-dried tomato Alfredo sauce was a tricky one, and I had to ponder a bit before finding a solution.  Regular Alfredo sauce, of course, (named for restaurateur Alfredo di Lelio), is heavy on cheese, milk, and butter.  Luckily, I found a delicious Alfredo sauce mix from Edward & Sons (available online at veganessentials.com), which you stir into water to make a sauce.  To get the sun-dried tomato aspect, I rehydrated three sun-dried tomatoes (packed without oil) in hot water for about 15 minutes, then combined the tomatoes with the prepared Alfredo sauce in a food processor and blended until smooth, adding about 2 tablespoons of the tomato soaking liquid to thin the sauce to the right consistency.  There are also numerous vegan Alfredo sauce recipes that pop up if you do a Google search, so whatever version you choose, use 1/3 cup for this recipe and save the rest for another use!


Nutrition Info:
3 servings (1/3 of the gratin), Calories 221

Tasting Notes:
Given my improvisation on the sun-dried tomato Alfredo sauce, I think I got this just right - the decadent flavor of the tomatoes come through without overwhelming the rest of the dish.  The rest of it was wonderfully creamy - almost melt-in-your-mouth - and the perfect antidote to a chilly fall night.  The only thing I didn't like about the recipe was that the polenta slices felt... imprecise as a base for the rest of it.  I would almost prefer it with homemade polenta patted into the bottom of the baking dish in an even layer, which could then be divided into squares.  But taste-wise, this was out of the park!

Rating:
4

Sunday, November 14, 2010

Smashed Potatoes, Parsnips, and Turnips

I love sneaking other root vegetables in with potatoes to add an unexpected twist to a mashed potato side dish.  This recipe is a great one to keep in mind for the upcoming Thanksgiving holiday!

Ingredients:
  • 5 cups peeled and cubed Yukon gold potato
  • 3 cups peeled and chopped parsnip
  • 3 cups peeled and chopped turnip
  • 1/4 cup vegan butter
  • 1 tablespoon bottled prepared horseradish
  • 1 and 1/2 teaspoons fine sea salt
  • 1/2 teaspoon black pepper
1. Combine the potato, parsnip, and turnip in a Dutch oven; cover with water.  Bring to a boil, then reduce heat and simmer until tender - about 15 minutes.  Drain.


2. Add the butter, horseradish, salt, and black pepper.  Mash with a potato masher to desired consistency, although as the title of this recipe suggests, the vegetables should still have some lumps and be more "smashed" than "mashed."

Note: you can make this dish ahead of time, but if so, you may want to thin it with about 1/2 cup reserved cooking liquid just before serving, as it will thicken as it sits.  If you like, you can use red potatoes in place of the Yukon gold.

I actually had something of a mini early Thanksgiving meal for myself tonight, trying out this side dish alongside the new Gardein stuffed turkey breast and some peas.

Nutrition Info:
10 servings (about 3/4 cup), Calories 160

Tasting Notes:
Wonderfully buttery, with the perfect note of something unexpected from the horseradish.  I liked it a little on the lumpier side, with occasional chunks of sweet parsnip or bitter turnip.  And the dish was wonderful alongside the Gardein turkey.

Rating:
3.5

Saturday, November 13, 2010

Orange Yogurt Cake with Golden Raisins and Pistachios

Last week I made a fairly standard blueberry coffee cake (see post for Blueberry Buckle with Walnuts and Ginger).  It was such a hit with my fiance that I decided to try another coffee cake for this week, but with a different flavor combination.

Ingredients:
For the crumbs:
  • 2 tablespoons all-purpose flour
  • 2 tablespoons vegan brown sugar
  • 1 tablespoon vegan butter
  • 2 tablespoons chopped pistachios
For the cake:
  • 1/4 cup Tofutti cream cheese
  • 2 tablespoons orange marmalade
  • 1 and 1/4 cups all-purpose flour
  • 1/2 teaspoon baking powder
  • 1/4 teaspoon baking soda
  • 1/8 teaspoon salt
  • 3/4 cup vegan sugar
  • 1/4 cup vegan butter
  • 2 teaspoons grated orange rind
  • 1 teaspoon vanilla extract
  • 1 Ener-G egg
  • 3/4 cup plain non-dairy yogurt
  • 3 tablespoons golden raisins
  • Cooking spray
1. To make the crumb topping, combine 2 tablespoons flour with the brown sugar in a small bowl.  Cut the butter into small pieces and cut into the flour mixture with a pastry blender until the mixture looks like coarse meal.  Stir in the pistachios and set aside.


2. Let the cream cheese soften slightly in a small bowl, then stir in the orange marmalade; set aside.

3. Lightly spoon the remaining 1 and 1/4 cups flour into dry measuring cups and level with a knife.  Combine the flour in a large bowl with the baking powder, baking soda, and salt; set aside.

4. In the bowl of a stand mixer, combine the sugar, 1/4 cup butter, orange rind, vanilla extract, and Ener-G egg; beat at medium speed until well blended.  Alternate adding the flour mixture and the plain yogurt to the sugar mixture, starting and ending with the flour mixture.  Stir in the golden raisins.

5. Pour the batter into a 9-inch round cake pan coated with cooking spray, spreading to form an even layer.  Spread the cream cheese/marmalade mixture evenly over the batter - use a smooth spatula for this slightly delicate operation, and take your time to ensure that you spread the cream cheese mixture all the way to the edges of the pan.  Sprinkle the top of the cake with the crumb mixture.

6. Bake at 350 degrees for 50 minutes - the cake should be golden brown by the end.  Let cool in the pan on a wire rack for 10 minutes, then remove from the pan.  You can serve the cake warm or at room temperature.

Note: I made the best find, when buying the raisins - naturally golden Hunza raisins from the Himalayas, which are not treated with sulfur to maintain a yellow color like other golden raisins on the market.  And they were certified organic to boot. If you don't want - or can't find - good golden raisins, this coffee cake would also be great with 3 tablespoons chopped dried apricots. In that case though, I recommend swapping out the pistachios for almonds.

Nutrition Info:
12 servings (1 wedge), Calories 195

Tasting Notes:
The sum of all its parts in the best way: the orange flavor from the rind, the salty crunch of the pistachios, the moistness of the cake batter itself, and a touch of bitterness from the orange marmalade.  In sum, a wonderful way to start the day, or a perfect pause with a cup of tea for an afternoon snack.

Rating:
4

Thursday, November 11, 2010

Swiss Chard with Garlic and Oregano

Try this super-easy side dish to get a dose of your leafy greens.

Ingredients:
  • 10 cups coarsely chopped Swiss chard
  • 1 teaspoon olive oil
  • 1 minced garlic clove
  • 1/4 teaspoon dried oregano
  • 1/8 teaspoon salt
  • Dash of black pepper
  • 2 teaspoons red wine vinegar
1. Rinse the Swiss chard with cold water and drain.  You want a bit of the water to still cling to the chard leaves, as it will help them wilt once in the saucepan.

2. Heat the olive oil in a large skillet over medium-high heat.  Add the minced garlic clove and saute for 1 minute.  Add the chard; cover and cook for 1 minute.  Stir in the oregano, salt, and black pepper, then cover and cook for 5 minutes, stirring occasionally, until the chard is tender and wilted.


3. Remove from heat and stir in the red wine vinegar.  You'll have just enough to serve two.  I added butternut squash and seashell pasta in tomato sauce to finish off this quick weeknight supper.

Nutrition Info:
2 servings (1/2 cup), Calories 51

Tasting Notes:
The chard was quite good, although I was a bit surprised that the red wine vinegar was dominant, almost overwhelming the tastes of garlic and oregano - normally when an ingredient is listed in the title, I expect that it will take center stage.  If I were to make this again, I'd decrease the vinegar to only 1 teaspoon.  That said, the chard was perfectly cooked and a nice way to round out a meal.  Although I used green chard, you could try using rainbow chard to add a pop of color to your plate.


Update: I made this again with red instead of green chard, and for whatever reason thought that it came out better.  The flavors blended more nicely, the vinegar was not overpowering, and the red and green color was a lovely fit for the holiday season!

Rating:
3

Wednesday, November 10, 2010

Greens with Roasted Corn and Pepper Salad

I loved the creamy dressing on this easy salad.  Since it had a southwestern feel to it, I served it alongside the roasted vegetable tamale from Amy's frozen foods, making for a quick weeknight supper!  You could also try it alongside any store-bought vegan burrito, or homemade tacos or burritos.

Ingredients:
  • 1 cup frozen corn kernels, thawed
  • 5 ounces drained and chopped bottled roasted red bell pepper
  • 1/2 cup chopped green onions
  • 1 seeded and finely chopped jalapeno pepper
  • 1/4 cup vegan sour cream
  • 3 tablespoons white wine vinegar
  • 1 teaspoon salt
  • 2 (10-ounce) packages Italian-blend salad greens
  • 3 tablespoons toasted pine nuts
1. Place the corn on a baking sheet lined with aluminum foil, and broil for 12 minutes, stirring half way through.  The corn should be lightly browned by the end.

Note: you can roast the corn up to 2 days ahead at this point, and resume the recipe as follows about an hour before serving time.


2. Let cool, then combine the corn kernels in a large bowl with the bell peppers, the green onions, and the jalapeno.  Whisk together the sour cream, vinegar, and salt, and pour over the corn mixture, tossing to coat.  Chill for 1 hour.


3. To serve, divide the greens evenly among 8 salad plates (about 2 cups per person).  Top each serving with about 1/4 cup of the corn mixture, and about 1 teaspoon of the pine nuts.

Note: take care when toasting the pine nuts - you have about a thirty second window between when they are golden and fragrant, and when they start to burn.  The best idea is simply to stand and watch the skillet the whole time, since it only takes about 3 minutes total.

Nutrition Info:
8 servings (2 cups salad, 1/4 cup corn mixture, 1 teaspoon pine nuts), Calories 73

Tasting Notes:
It's hard for me to put my finger on why this salad worked so well, but it did.  I'm not usually a radicchio or endive lover (two predominant greens in Italian salad mix) but between the sweet bell pepper, the earthy taste of the roasted corn, and the toasted crunch of the pine nuts, it all blended beautifully.  My only alteration in the future would be to double the corn mixture and decrease the amount of greens, so that the sour cream dressing can coat all the lettuce evenly.

Rating:
3

Sunday, November 7, 2010

Beef, Beer, and Barley Stew

The clocks have been set back an hour and darkness fell early tonight... so it felt like the perfect night to prepare a winter stew.  This recipe was a bit complicated and time consuming, but would create a splash for dinner guests, and will wow your taste buds on any night, so it's worth the effort!

Ingredients: 
  • 2 tablespoons olive oil
  • 1 pound frozen Gardein beefless tips (about 3 and 3/4 cups)
  • 1/4 teaspoon black pepper
  • 3 cups coarsely chopped onion
  • 2 bay leaves
  • 2 fresh thyme sprigs
  • 2 tablespoons tomato paste
  • 2 cups (1 and 1/2-inch thick) sliced carrot
  • 2 cups peeled and chopped turnip
  • 3/4 cup uncooked pearl barley
  • 5 minced garlic cloves, divided
  • 2 (8-ounce) packages button mushrooms, cut into quarters
  • 3 cups water
  • 3 cups vegan beef broth (prepared from Not Beef bouillon)
  • 2 tablespoons Annie's Worcestershire sauce
  • 1 (12-ounce) bottle Sierra Nevada stout (or other vegan dark beer)
  • 3 small beets
  • 3 tablespoons chopped fresh parsley
  • 1 teaspoon thyme leaves
  • 2 tablespoons bottled prepared horseradish
1. Heat the olive oil in a stockpot or Dutch oven over medium-high heat.  Toss the frozen Gardein beef with the black pepper, then add to the pot and saute for 8-10 minutes, until browned.  Remove the beef from the pan and set aside.  Add the onion, bay leaves, and thyme to the pan; cover, reduce heat, and cook for 10 minutes, stirring occasionally.  Don't worry if browned bits accumulate on the bottom of the pan as you cook the beef, since it will all dislodge as you cook the onions.

2. Stir in the tomato paste, then increase the heat back to medium-high.  Add the carrot slices, turnips, pearl barley, 4 of the garlic cloves, and the mushrooms; saute for 3 minutes.  Return the beef to the pan, along with the water, beef broth, Worcestershire sauce, and beer.  Make sure to pour in the beer slowly, so it doesn't fizz up!  Bring to a boil, then reduce the heat to low, cover, and simmer for 1 and 1/2 hours.  Discard the bay leaves and thyme sprigs at the end.


3. While the stew simmers, trim the beets but leave about 1 inch of the stem and the root on each.  Place in a saucepan and cover with water, then bring to a boil.  Cover, reduce heat, and simmer for 35 minutes.  Drain, rinse the beets with cold water, then drain again and let cool.  Still leaving on the stems and roots, rub the skins off the beets - they will rub off easily, but do be prepared to get your fingers purple.  Cut each beet into 6 wedges; set aside.

4. In a small bowl, combine the final garlic clove with the parsley and thyme leaves.


5. Ladle 2 cups of stew into each of 6 bowls.  Top each serving with 3 beet wedges, 1 and 1/2 teaspoons of the parsley mixture, and 1 teaspoon horseradish.  I liked this with some cooked wild rice and roasted cipollini onions on the side, to round out the meal.

Nutrition Info:
6 servings (2 cups stew, 3 beet wedges, 1 and 1/2 teaspoons parsley mixture, 1 teaspoon horseradish), Calories 379

Tasting Notes:
I am still new to cooking with Gardein products, so the last time I had real beef stew was nearly twenty years ago.  The instant I tasted this, it brought back memories of my father's "famous" beef stew - the tender, sweet carrots, the savory pieces of vegan beef, and the richness of the broth.  I loved the way that the beets continued to infuse into the broth the longer they stayed in the bowl, and the barley was cooked to perfection.  All-in-all, I can't wait to let my dad know I've come up with a vegan version that's just as good as his famous beef stew!

Rating:
4

Saturday, November 6, 2010

Blueberry Buckle with Walnuts and Ginger

What is a "buckle," you may ask, upon reading the title of this recipe.  Indeed, I was curious as well.  I found the recipe in a feature on coffee cakes, and did some research to discover that in a buckle, fruit is sprinkled on top of the batter, as opposed to gently folded in, so that the batter "buckles" around the fruit as it cooks.  Another online source I found said that it has to do with the crumb or streusel mixture sprinkled on top, which gives the cake a "buckled" or crumpled appearance.  My before and after pictures below should give you a sense of what to expect it to look like.  Either way, it's enough to know that a buckle is a form of a coffee cake, and a delicious addition to breakfast, brunch, or dessert in your near future! 

Ingredients:
For the crumbs:
  • 2 tablespoons all-purpose flour
  • 2 tablespoons vegan brown sugar
  • 1/8 teaspoon ground cinnamon
  • 1 tablespoon vegan butter
  • 2 tablespoons toasted and chopped walnuts
For the cake:
  • 1 and 1/4 cups all-purpose flour
  • 1 and 1/4 teaspoons baking powder
  • 1/8 teaspoon salt
  • 1/2 cup vegan sugar
  • 1/3 cup packed vegan brown sugar
  • 3 and 1/2 tablespoons vegan butter
  • 1 and 1/2 teaspoons peeled and grated fresh ginger
  • 1 teaspoon vanilla extract
  • 1 Ener-G egg
  • 1/2 cup plain non-dairy milk
  • Cooking spray
  • 2 cups frozen blueberries
  • 1 and 1/2 teaspoons vegan powdered sugar
1. To make the crumb topping, combine the first 3 ingredients in a small bowl, then cut in 1 tablespoon butter with a pastry blender until the mixture looks like coarse meal.  Stir in the toasted walnuts; set aside. 

(Note: the quickest way to toast nuts is to place them in a skillet over medium-high heat for about 3 minutes, stirring or shaking the pan frequently so the nuts do not burn.  Rely on your sense of smell to tell you when the nuts are done!)

2. Lightly spoon 1 and 1/4 cups flour into dry measuring cups, and level with a knife.  Combine the flour in a large bowl with the baking soda and salt; set aside.

3. In the bowl of a stand mixer, combine the sugar, 1/3 cup packed brown sugar, 3 and 1/2 tablespoons butter, the ginger, the vanilla extract, and the Ener-G egg; beat at medium speed until well blended.

4.  Alternate adding the flour mixture and the milk to the sugar mixture, starting and ending with the flour mixture.

5. Pour the batter into a 9-inch round cake pan coated with cooking spray, and sprinkle the top with the frozen blueberries and the crumb mixture.  Bake at 350 degrees for 1 hour - a wooden pick inserted in the center at the end should come out clean.


6. Cool for ten minutes in the pan on a wire rack, then carefully remove from the pan.  I found it easiest to invert the cake onto one plate, then invert back onto a second plate for serving so it was right-side up again.  Sift the powdered sugar over the top of the cake before serving.  You can serve this while still warm, or let it come to room temperature.


Nutrition Info:
12 servings (1 wedge), Calories 189

Tasting Notes:
It was really the ginger that made this dish.  I've baked plenty of blueberry cakes/muffins/banana breads in the past, so much so that they lump together in my mind.  But the subtle ginger bite in each mouthful of this buckle made it a cross between a gingerbread and a coffee cake, and that made it delicious.

Rating:
3.5

Thursday, November 4, 2010

Angel Hair Pasta Delight

If you have not yet discovered Gardein vegan meats, I can't recommend more that you do so.  Rather than just containing wheat gluten or soy protein, the company's products are made of a blend of quinoa, kamut, millet, and amaranth.  These "ancient grains" pack a nutritional punch, as well as providing eerily accurate vegan alternatives to beef and chicken.  Whenever I see a recipe that calls for chicken breast, as I result, I now head to the store and grab a package of Gardein's Tuscan chicken breasts, as I did for this pasta dish tonight. Cook both the chicken and the Lightlife bacon according to package directions before adding to this recipe.

Ingredients:
  • 2 teaspoons olive oil
  • 1 and 1/2 cups chopped sweet onion (such as Vidalia)
  • 3 minced garlic cloves
  • 1/4 cup water
  • 1 (9-ounce) package fresh spinach, chopped
  • 2 cups chopped plum tomato
  • 2 cups chopped and cooked Gardein Tuscan chicken breast (without sauce)
  • 1/4 cup chopped and cooked Lightlife bacon
  • 3 tablespoons balsamic vinegar
  • 8 ounces uncooked angel hair pasta
  • 1/4 cup shredded vegan cheese
1. Heat the oil in a large skillet over medium-high heat.  Add the onions and saute for 2 minutes.  Add the garlic and saute for 1 minute.  Add the water and the chopped spinach; cover and cook for 2 minutes, so the spinach is wilted by the end.

2. Stir in the plum tomato, chicken, bacon, and balsamic vinegar; cook a final minute to heat thoroughly.

3. Meanwhile, cook 8 ounces of angel hair pasta according to package directions, to yield 4 cups cooked pasta.  Drain; top the pasta with the spinach mixture and the shredded cheese.  I particularly liked the strong cheddar from Sheese on this dish, to mimic the flavor of a sharp cheese like Asiago.

Nutrition Info:
4 servings (1 cup pasta, 1 cup spinach mixture, 1 tablespoon cheese), Calories 350

Tasting Notes:
Delicious.  I felt like I was getting a different combination of flavors in every bite, depending what was most prominent on my forkful, whether the chicken, the bacon, the spinach, or the tomato.  I liked serving this with some spears of asparagus wrapped in extra Lightlife bacon slices on the side.

Rating:
3.5

Tuesday, November 2, 2010

Pear-Cranberry Sauce

I love cranberries and I love cranberry sauce, and I am a firm believer that this dish shouldn't make an appearance but once a year at the Thanksgiving table.  As soon as fresh cranberries hit the market (i.e. right about now) I like trying out new variations on this holiday staple.

The only reason cranberry sauce can be tricky is that most recipes in cookbooks feed a dozen people or more.  Luckily I spotted this little gem that makes just enough to serve 2.  Try it tonight as a side dish, or even as a compote for dessert, and make it again on Thanksgiving in larger quantities to feed a crowd.  I liked it alongside slices of vegan smoked turkey.  Since cranberries normally come sold in 12-ounce packages, you can refrigerate whatever doesn't get used in this recipe for up to 1 month, or freeze up to 9 months.

Ingredients:
  • 1/3 cup fresh cranberries
  • 3 tablespoons water
  • 2 peeled and coarsely chopped Bartlett pears
  • 1 tablespoon vegan sugar
  • 1/4 teaspoon grated orange rind
1. Combine the cranberries, water, and chopped pears in a small saucepan.  Cover and cook over medium-low heat for 25 minutes, removing the lid to stir occasionally.  By the end, the cranberries will have 'popped' (a beautiful sound!), and stained the pears a pretty pink.


2. Remove the pan from heat and stir in the sugar and the orange rind.  Cool to room temperature before serving.

Nutrition Info:
2 servings (about 1/3 cup), Calories 118

Tasting Notes:
Believe it or not, it was cranberry taste that I found missing from this dish!  The pears were wonderfully tender, and the small amount of orange rind infused the sauce with a wonderful note of orange, but the cranberries got a bit lost along the way.  If I made it again, I would increase the cranberries to even out the flavor a bit.  If you like, you could also use 1 apple and 1 pear to vary the flavor slightly.

Rating:
3

Monday, November 1, 2010

Indian Bread Pudding with Cardamom Sauce

Bread pudding... just the idea of these warm desserts makes me feel cozy inside, as winter closes in.  Bread puddings are an especially great dessert to keep in mind this time of year since they're perfect for company - once assembled ahead of time, all you need to do is pop it in the oven shortly before dessert.

The other great feature of bread pudding, of course, is how versatile it can be flavor-wise.  Tonight, I decided to do a bread pudding with the flavors of Indian and Middle Eastern cuisine - notably rose-flower water, cardamom, and pistachios.  This dessert would be the perfect ending to any tagine or Indian entree.

The only reason this particular recipe posed a challenge for a vegan is that it called for evaporated milk.  Available in a can to a dairy eater, the vegan chef has to do a little prep work and make her own.  Of course, the quick method is to stir double the concentration of soy or rice milk powder into water, but I actually prefer the slow method: pour 3 cups of plain non-dairy milk into a saucepan and cook over medium-low heat until reduced to 1 and 1/2 cups, stirring constantly (it will take about 1 and 1/2 hours).  The process can be remarkably fun with some music going in the background and a book or magazine on hand to read while you stir!  Or, as I did this afternoon, it's great time to zone out and think and take a pause from a busy day.  I recommend making your evaporated non-dairy milk ahead of time (it will keep in the fridge for about 5-7 days), so you can assemble this bread pudding in a pinch the day you make it.

Now on to the Indian Bread Pudding...

Ingredients:
For the pudding:
  • 9 (1-ounce) slices white bread
  • 2 tablespoons melted vegan butter
  • Cooking spray
  • 1 cup evaporated non-dairy milk
  • 3 tablespoons vegan sugar
  • 1/4 teaspoon rose-flower water
For the sauce:
  • 2 tablespoons vegan sugar
  • 2 Ener-G egg yolks
  • 1 cup plain non-dairy milk
  • 1/8 teaspoon ground cardamom
  • 1 tablespoon finely chopped pistachios
1. Trim the crusts from the bread slices, and arrange in a single layer on a baking sheet.  Brush with the melted butter, then bake at 400 degrees for 8 minutes.

2. Cool the bread on a wire rack for 5 minutes, then cut each slice into 4 squares (so you have 36 pieces of toast in total).  Arrange the toast pieces in overlapping rows in an 11x7-inch baking dish coated with cooking spray.  My fiance was in the kitchen as I worked on this step, and remarked, "That looks so cute!"


3. In a bowl, whisk together the evaporated milk, 3 tablespoons vegan sugar, and the rose-flower water.  Pour evenly over the bread, then cover and refrigerate for at least 30 minutes and up to 4 hours.  As always when I make recipes that offer long variations in chilling time, I aim for about the halfway mark, so I prepared my bread pudding about 2 and 1/2 hours in advance.

4. To bake the pudding, cover with foil and bake at 350 degrees for 15 minutes.

5. While the pudding bakes, make the sauce: whisk 1 tablespoon Ener-G egg replacer into 2 tablespoons warm water to make the equivalent of 2 egg yolks.  Combine the Ener-G mixture with 2 tablespoons vegan sugar in a medium-sized bowl.

6. Heat 1 cup non-dairy milk in a small, heavy saucepan over medium heat until bubbles form around the edges, but before it comes to a boil.  I've learned that even though recipes calling for dairy milk say this step will happen at 180 degrees, non-dairy milk gets there faster, closer to 150 or 160 degrees... so watch your saucepan carefully, and use a thermometer as a guide.

7. Gradually add the hot milk to the Ener-G mixture, stirring constantly with a whisk.  Transfer the mixture back to the saucepan and continue to cook over low heat for 6 minutes, stirring constantly with a whisk.  The sauce should be thick enough by now to coat the back of a wooden spoon.  Remove from the burner and stir in the cardamom.  Place the saucepan in a large bowl filled with ice and let cool to room temperature, stirring occasionally (it should only take about 5 minutes).  Be careful not to let the saucepan sit in the ice too long, or the sauce will begin to seize up.


8. Serve 6 bread squares warm from the oven on each of 6 dessert plates.  Top each serving with about 2 and 1/2 tablespoons of the sauce and 1/2 teaspoon of the chopped pistachios.

Nutrition Info:
6 servings (6 bread squares, 2 and 1/2 tablespoons sauce, 1/2 teaspoon pistachios), Calories 272

Tasting Notes:
Right off the bat: sublime.  The hints of cardamom and the sweetness of the evaporated soy milk came through instantly.  The toasted bread pieces were crisp on the outside but melt-in-your-mouth on the underside where they had soaked the most during chilling.  The one flavor that didn't come through as much as I hoped was the rose-flower water, so I would highly recommend upping the amount to 1/2 teaspoon if you want it to shine through.  Overall, eating this made me think it would easily translate into amazing French toast for breakfast - I would toast the bread the same way, dip in a milk/cardamom mixture before cooking in a skillet, and serve with pistachios sprinkled on top.

Rating:
4